[Guide] Remotely Access Your Raspberry Pi From Outside Network - Easy Setup
Are you yearning for the freedom to tinker with your Raspberry Pi, no matter where you are? The ability to remotely access your Raspberry Pi from outside your home network is a game-changer, unlocking a world of possibilities from monitoring your home automation system to developing projects on the go. No longer tethered to your local network, you can unleash the full potential of your miniature computer from anywhere with an internet connection. This power empowers you with unprecedented control and convenience, transforming your Raspberry Pi from a static device into a dynamic, accessible tool.
The initial steps might seem daunting, but fear not. We will dissect the process, breaking down the essential components and providing a clear roadmap for establishing a secure and seamless remote connection. The journey involves navigating network configurations, understanding security protocols, and selecting the appropriate tools to facilitate this remote access. The reward? A fully accessible Raspberry Pi, ready to respond to your commands from across the globe. This article will navigate you through the intricacies of setting up remote access, exploring secure methods that safeguard your device and data while granting you unparalleled control.
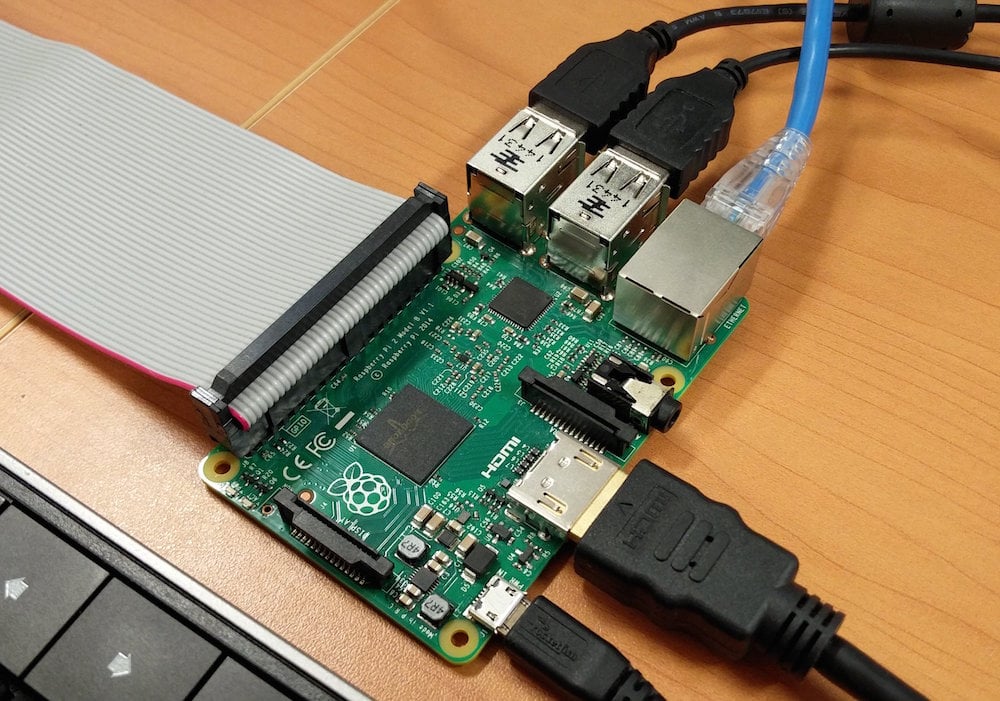
This endeavor hinges on several key components. First and foremost is your Raspberry Pi itself, running an operating system like Raspberry Pi OS (formerly Raspbian). Then, you'll require a stable internet connection, both at the location of your Raspberry Pi and at the location from which you intend to access it. Next, understanding your home network configuration is crucial. This includes identifying your public IP address, the gateway to the outside world, and the process of configuring port forwarding on your router. Finally, the selection of an appropriate remote access method, such as SSH (Secure Shell) or a more user-friendly solution like a VPN (Virtual Private Network) is paramount for security and ease of use. The choice of which method depends on your technical comfort level and the specific requirements of your project. Each method presents its own advantages and considerations, but both can grant you the freedom to operate your Raspberry Pi remotely.
Before diving into the technical specifics, it's essential to understand the fundamental concepts at play. Your Raspberry Pi, by default, resides behind your home router, which acts as a firewall, protecting it from unsolicited connections from the internet. To allow remote access, you must effectively "punch a hole" through this firewall by configuring port forwarding. Port forwarding instructs your router to forward incoming traffic on a specific port (a virtual doorway for communication) to the internal IP address of your Raspberry Pi. This allows external requests to reach your Raspberry Pi. Additionally, you will need to know your public IP address. This is the address that identifies your home network on the internet. Many websites can easily reveal this information, and you will need it to connect from outside your network.
Lets explore the most common approach: using SSH. SSH provides a secure, encrypted connection to your Raspberry Pi, allowing you to execute commands, transfer files, and manage your system remotely. To enable SSH on your Raspberry Pi, you'll first need to ensure it is enabled. Typically, this is done during the initial setup of Raspberry Pi OS, or by using `raspi-config`. After SSH is enabled, you will need to find your Raspberry Pi's internal IP address. This can be found by using the `ifconfig` command in the terminal of your Raspberry Pi. For instance: `ifconfig | grep "inet "` . Then, to connect from another computer, open a terminal or command prompt and type: `ssh pi@`. You may be prompted for your password. Once you enter your password, you will be logged into your Raspberry Pis command line interface. The security of SSH relies heavily on a strong password. Its highly recommended to change the default password on your Raspberry Pi and to use a complex, unique password. You can also further enhance security by using SSH keys.
The next crucial step is setting up port forwarding on your router. This process varies depending on the make and model of your router, but the general principle remains the same. You will need to access your router's configuration interface, usually by typing its IP address into a web browser (e.g., 192.168.1.1 or 192.168.0.1). Consult your router's manual if you are unsure of the IP address or how to access the settings. Within the router's configuration, look for a section related to "Port Forwarding," "Virtual Servers," or similar terminology. You will need to create a new rule. In this rule, specify the port you wish to forward (typically port 22 for SSH), the internal IP address of your Raspberry Pi, and the protocol (TCP). It is essential to select the correct protocol; otherwise, connections will fail. Once you have configured port forwarding, you can then connect to your Raspberry Pi from outside your home network using your public IP address. You would use the same SSH command as before, but replace the internal IP address with your public IP address: `ssh pi@`. Keep in mind that your public IP address can change over time, which requires you to manually update it.
For a more user-friendly and secure approach, consider setting up a VPN (Virtual Private Network). A VPN creates an encrypted tunnel between your device and your home network, allowing you to access your Raspberry Pi as if you were on the same local network. This method is generally more secure than relying solely on port forwarding for SSH, as it encrypts all traffic and hides your public IP address. Several VPN solutions are available for Raspberry Pi, including WireGuard and OpenVPN. Setting up a VPN on your Raspberry Pi typically involves installing the VPN server software, configuring the server settings, and generating client configuration files for each device you wish to connect. A significant advantage of a VPN is that it allows you to access other devices on your home network with ease, not just your Raspberry Pi. The setup can be somewhat more complex than setting up SSH, but the enhanced security and ease of access often make it the preferred choice.
Once you have chosen a method and completed the setup, you will want to test your connection. To test SSH, close any active SSH sessions and attempt to connect from a different network (e.g., using your mobile data or connecting to a public Wi-Fi network). If you have configured a VPN, connect to your VPN server and then try accessing your Raspberry Pi through its internal IP address. If the connection is successful, congratulations you can remotely access your Raspberry Pi! However, the journey does not end here; it is important to take steps to secure your setup.
Regardless of the method you choose, securing your remote access is paramount. Start by changing the default username and password of your Raspberry Pi, or at least your user account. This is the first line of defense against unauthorized access. Use strong, unique passwords that are difficult to guess. Consider using a password manager to generate and store these passwords. Enable two-factor authentication (2FA) for SSH if possible, which requires a second form of verification (such as a code from an authenticator app) in addition to your password. Implement a firewall on your Raspberry Pi to restrict access to specific ports and services. A firewall can block unauthorized traffic and limit the attack surface. Regularly update your Raspberry Pi's operating system and software packages. These updates often include security patches that address vulnerabilities. Keep your software up-to-date to protect against known exploits. Finally, monitor your Raspberry Pi's activity logs for suspicious activity. Regularly review logs for unusual login attempts or other signs of compromise.
Dynamic DNS (DDNS) services can simplify the process of connecting to your Raspberry Pi. As mentioned earlier, your public IP address is prone to change. A dynamic DNS service provides you with a static hostname that always points to your current public IP address. This eliminates the need to constantly update your connection details. Numerous DDNS providers are available, and most are free. Youll need to sign up for an account with a DDNS provider, configure the DDNS client on your Raspberry Pi, and configure your router to update the IP address. Once this is done, you can connect to your Raspberry Pi using your DDNS hostname instead of your public IP address, such as `ssh pi@yourdomain.ddns.net`.
Beyond basic remote access, you can unlock a multitude of possibilities. With remote access enabled, you can monitor sensors and control actuators in your home automation system, control devices. You can also access files and run applications on your Raspberry Pi from anywhere. Moreover, you can use your Raspberry Pi as a web server, hosting websites or web applications, manage your media server, or use it for other applications such as a personal cloud storage. Remote access opens a vast landscape of creative and practical applications. The true potential of your Raspberry Pi is fully realized when you can control it remotely.
Troubleshooting remote access can be a frustrating experience. If you are unable to connect, first verify that your Raspberry Pi is powered on and connected to the internet. Confirm that SSH is enabled (if using SSH), the VPN is running (if using a VPN), and that you have the correct IP address or DDNS hostname. Double-check your port forwarding configuration on your router. Ensure that the port numbers, internal IP address of your Raspberry Pi, and protocol are correctly configured. If you are using a firewall on your Raspberry Pi, make sure that it allows traffic on the necessary ports. If you are still unable to connect, try temporarily disabling your firewall to see if that resolves the issue. Furthermore, ensure that your ISP is not blocking the ports you need to forward. In some cases, ISPs may block specific ports or restrict access to certain services.
In conclusion, remotely accessing your Raspberry Pi from outside your home network is not only feasible but also highly beneficial. By understanding the underlying concepts, configuring your network settings, and choosing a secure remote access method, you can unlock the full potential of your Raspberry Pi. The ability to control your device from anywhere opens doors to creative projects, home automation, and countless other applications. Remember to prioritize security by implementing strong passwords, enabling two-factor authentication, and keeping your software up-to-date. With the proper knowledge and careful planning, you can enjoy the freedom and flexibility of remote access while keeping your Raspberry Pi and data safe. The possibilities are truly endless.

